Complete Guide to Leather Edge Finishing (Vegetable-Tanned Leather)
Edge finishing is the thing that separates a finished piece from an unfinished one. Not stitching. Not the leather choice. The edges.
You can have perfect stitching and beautiful leather and the piece still looks wrong if the edges are rough and fibrous. It is the last thing you do and somehow the thing people notice first.
This is how I do it.
Before You Start
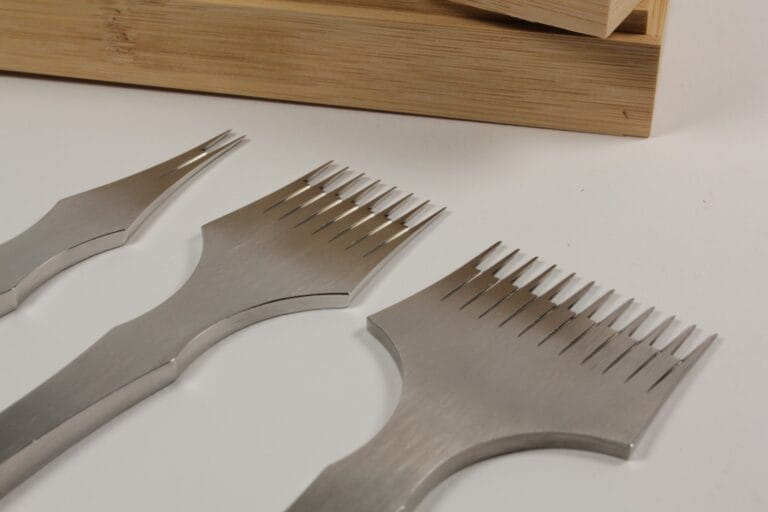
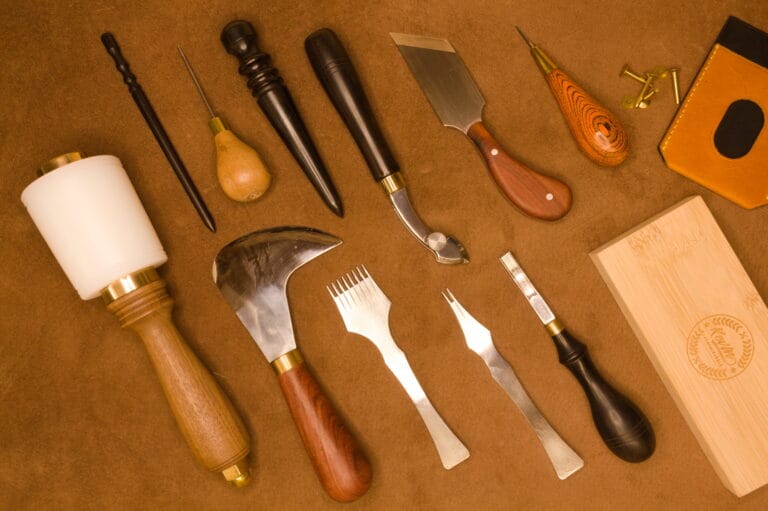
You need sandpaper — 240, 400, 600, 800, and 1000 grit. Not just one or two. All of them. An edge beveller — the size you choose depends on how rounded you want that edge to look. Smaller sizes give a subtle, refined bevel that suits fine work and small goods. Larger sizes remove more material and suit heavier or more rustic work. It is entirely preference. A burnishing compound, either Tokonole or Gum Tragacanth. And something to burnish with — a wooden slicker, a piece of canvas, or a motorised setup if you are doing a lot of belt and strap work.
That is all you need. The rest is preparation.
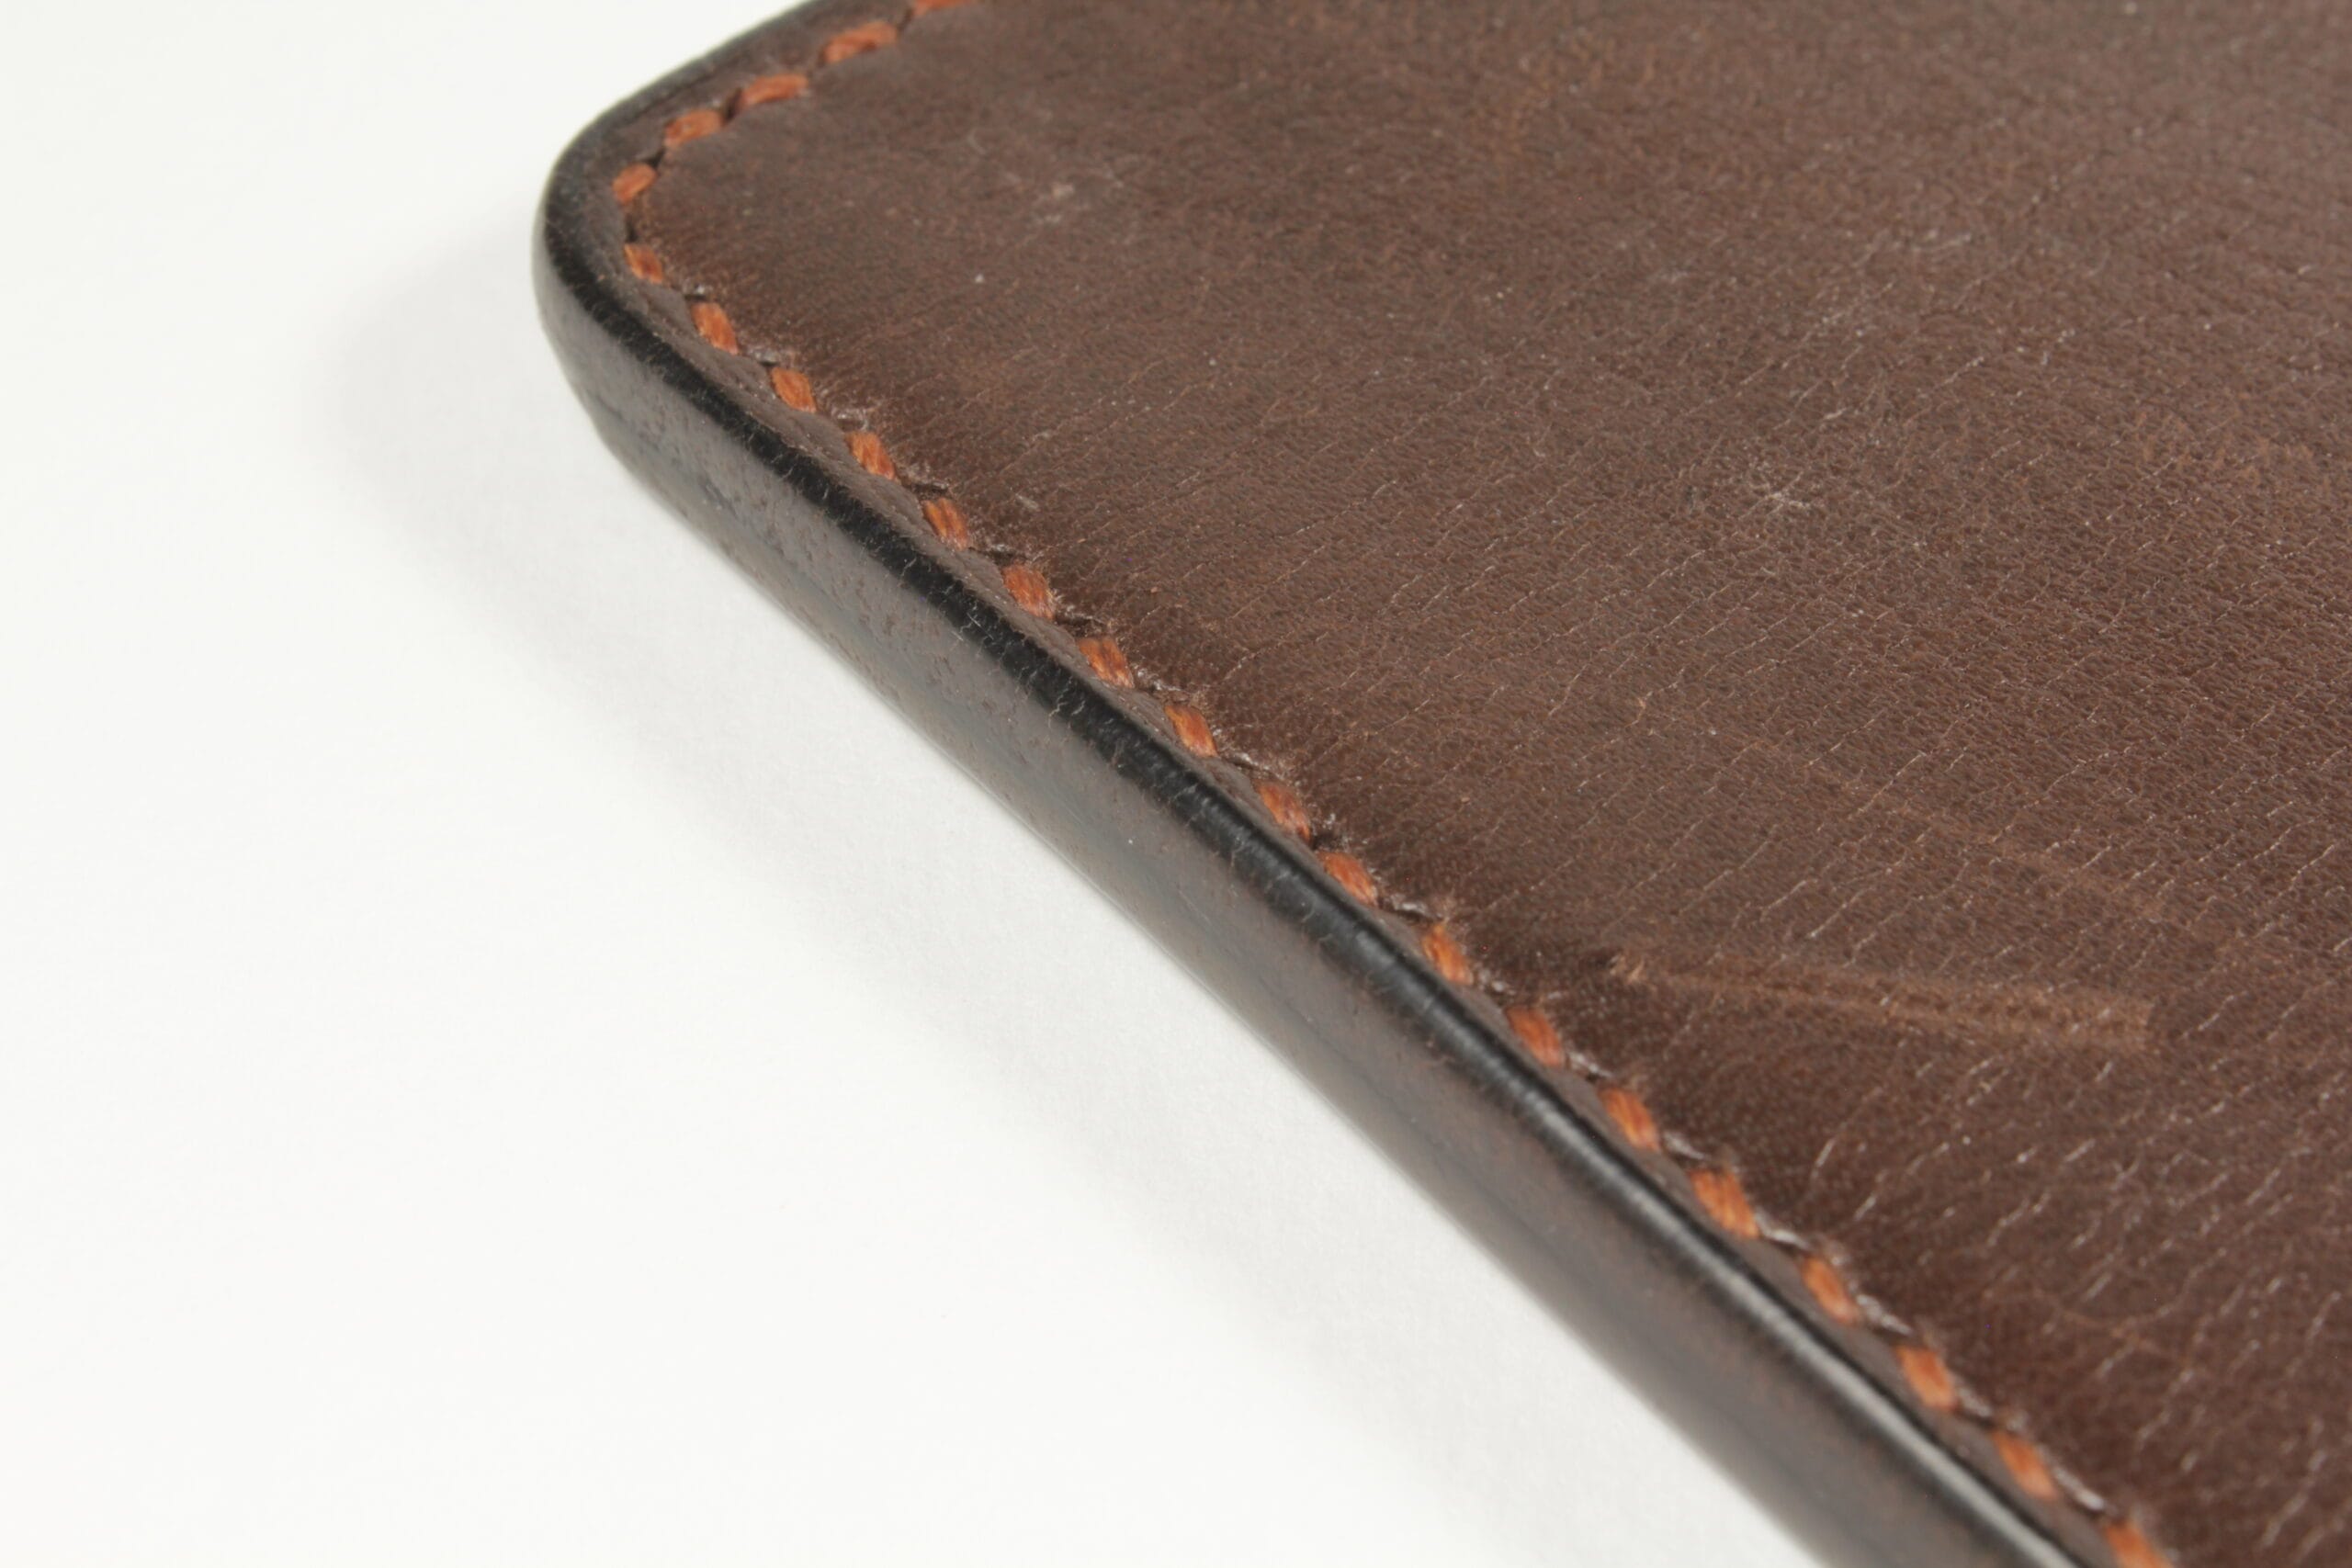
Sand First, Bevel Second
Most beginners get this the wrong way around. They bevel first and then sand, and the results are never quite right. The bevel sits on an uneven surface and never compresses cleanly.
Sand first. Level the edge. Then bevel.
My progression is 240, 400, 600 — then I wet my fingertip and lightly dampen the edge — then 800, dampen again, then 1000. The dampening between grits is not optional, it is the point. It encourages the fibres to lie flat rather than just getting abraded. Skip that step and they lift later, usually after you have already applied compound and thought you were done.
If you skip grits to save time, the fibres will tell you about it later. Every stage removes the scratches from the stage before. That is why they all matter.
Bevel Both Sides
Once the edge is properly levelled, bevel both sides. The beveller takes the sharp corner off the face of the leather and creates the profile that compresses cleanly when you burnish it.
How much you take off is your call. A subtle bevel on a slim wallet looks right. A more rounded, pronounced edge on a heavy belt looks right too. Neither is wrong — they suit different work and different aesthetics. Pick the size that matches what you are making.
Browse Kevin Lee edge bevellers at Hideout Craft
Tokonole or Gum Tragacanth
People overthink this. Both work. The difference is more about character than quality.
Tokonole is what I reach for most of the time. It is consistent, it spreads evenly, and it works on edges and flesh sides which makes it useful when you are also slicking the inside of wallet panels or bag linings. Clean, modern, predictable.
Seiwa Tokonole Burnishing Agent — Clear, Black and Brown
Gum Tragacanth I use on traditional builds. Anything where I am using linen thread, doing repair work, or building something where the old-school character of the materials matters. It has a slightly different feel in the finished edge — less refined, more natural. On a rustic belt or a restoration job it feels right in a way that Tokonole does not quite replicate.
Fiebing’s Gum Tragacanth — 118ml
Neither product rescues bad preparation. That needs to be said plainly. If the sanding is rushed, no amount of burnishing compound fixes it.
Burnishing
For small goods I do it by hand. A wooden slicker or a piece of canvas, working back and forth along the edge with moderate pressure. You can feel what the leather is doing — when it starts to tack, when the fibres are compressing, when to ease off. That feedback is worth a lot when you are learning.
For belts and long straps I use a motorised burnisher. After years of typing for my day job my wrists carry some strain and extended hand burnishing on long runs aggravates it. The motorised setup is consistent and fast. But it does not hide poor preparation — if anything it makes it more obvious. A rough edge run through a motorised burnisher at speed is just a rough edge, faster.
The Second Pass
On anything I care about I do a second pass. Let the first burnish dry fully, sand lightly at 800 to 1000 grit again, apply a thin coat of compound and burnish once more with controlled pressure. The surface tightens up noticeably and the durability on anything that flexes — belts, straps, bag handles — improves.
If you find yourself needing to apply a lot of compound at the second pass stage, the first pass preparation was not good enough. Go back and sand properly.
What Goes Wrong
The most common mistake is skipping grit stages. The second most common is bevelling before sanding. After that it is applying too much compound — more is not better, a thin even coat worked in properly beats a heavy application every time.
The one that catches people out most often is trying to correct poor preparation with more product. It does not work. It has never worked. Sand properly and the rest of the process is straightforward.
What About Chrome-Tanned Leather?
This guide is for vegetable-tanned leather. Chrome-tanned leather does not behave the same way — the fibres do not compress, Tokonole and Gum Tragacanth give inconsistent results on it, and you will drive yourself mad trying to burnish it to a smooth finish.
For chrome-tan, use a paint-on edge finish like Fiebing’s Edge Kote instead. It seals and colours the edge rather than trying to compress fibres that do not want to be compressed.
If your edges are refusing to behave no matter what you do, check what leather you are actually working with. It might not be a technique problem at all.
Fiebing’s Edge Kote — Black, Brown and Neutral
Frequently Asked Questions
What grit sandpaper for leather edges?
240, 400, 600, then dampen, 800, dampen again, 1000. Do not skip stages. Each one removes the scratches from the one before it.
Bevel before or after sanding?
After. Always after. Sand the edge level first, then bevel. The other way around gives you a bevel sitting on an uneven surface and the compression is never right.
What size edge beveller should I use?
That comes down to preference and the piece you are making. A smaller size takes off less material and gives a subtle, refined edge — good for fine work and small goods. A larger size gives a more pronounced rounded edge that suits heavier or more rustic work. Try both on a scrap piece and see what looks right to you.
Can you use just water to burnish?
Water alone compresses fibres temporarily but does not seal them. It is fine as part of the sanding process between grits but it is not a substitute for proper burnishing compound.
How smooth before applying compound?
Smooth enough that it feels smooth to the touch and looks uniform. If it still feels slightly rough or fibrous at 1000 grit, keep going. The compound is not going to fix what the sandpaper did not.
Does Tokonole work on chrome-tanned leather?
Not reliably. Use Edge Kote on chrome-tan.
Do I need a motorised burnisher?
No. Hand burnishing works perfectly well for most things. I only reach for the motorised setup for long strap and belt work.