Leather Adhesives – Choosing the Right Glue for the Job
There is a question I get asked more often than most.
Not about stitching. Not about irons. About glue.
Specifically: which one, and how do you use it properly?
It seems like a simple question. It is not. The adhesive you choose affects your build process, your margin for error, and ultimately how well the piece holds together before the thread even goes in. I use adhesives every day in my own work. This guide explains what I actually do — and why.
Leather is used in everything from handcrafted wallets to car seats to sofa repairs — and the question of which glue to use comes up across all of it. This guide covers the full range: from quick household fixes through to the proper adhesives used by leatherworkers in the workshop every day.
Leather is used in everything from handcrafted wallets to car seats to sofa repairs — and the question of which glue to use comes up across all of it. This guide covers the full range: from quick household fixes through to the proper adhesives used by leatherworkers in the workshop every day.
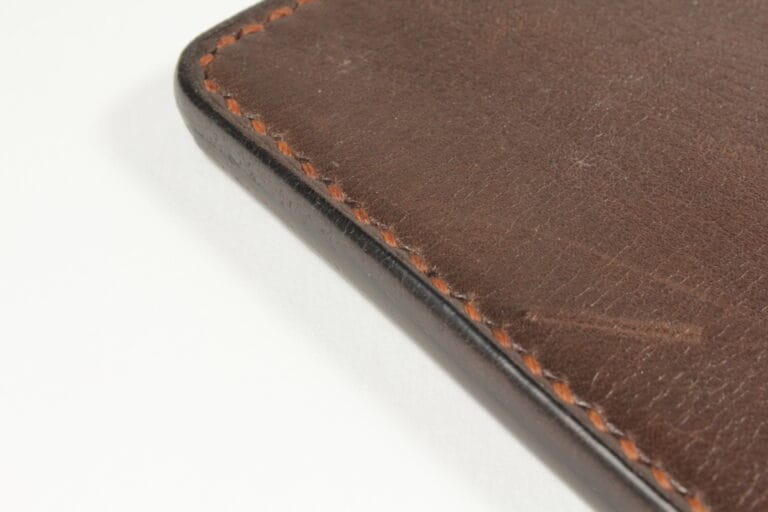
Why Gluing Matters in Leathercraft
Adhesive in leathercraft is not there to hold the piece together permanently. That is the job of the stitching.
What adhesive does is hold layers in alignment while you mark, punch, and stitch. Without it, layers shift. Your stitch line drifts. The piece moves when you do not want it to. Done correctly, gluing is invisible in the finished piece. Done poorly, it causes problems that no amount of careful stitching can fix.
Leather is used in everything from handcrafted wallets to car seats to sofa repairs — and the question of which glue to use comes up across all of it. This guide covers the full range: from quick household fixes through to the proper adhesives used by leatherworkers in the workshop every day.
Leather is used in everything from handcrafted wallets to car seats to sofa repairs — and the question of which glue to use comes up across all of it. This guide covers the full range: from quick household fixes through to the proper adhesives used by leatherworkers in the workshop every day.
Types of Leather Adhesive
Before choosing a product, it helps to understand the main categories. Each works differently and suits different situations.
Leather cement — applied to one or both surfaces while still wet and bonded while tacky. Gives a working window for repositioning. Fiebing’s Leather Cement is the widely used example. Good for complex builds and anyone still developing their eye for alignment.
Contact adhesive — applied to both surfaces and allowed to dry fully before bonding. When the two dry surfaces meet, the bond forms immediately. Very strong, very little forgiveness. Renia Aquilim is the professional standard here. Suits makers who work deliberately and know exactly where their panels are going before they press.
Super glue / cyanoacrylate — dries rigid and brittle. Not suitable for leather that flexes or bends. Can cause white residue on darker leather. Occasionally useful for a very small rigid fix — a loose heel tip, a fraying edge on a rigid component — but not a proper leathercraft adhesive.
PVA glue — light hold only. Will temporarily position pieces for light sewing in a pinch, but will not provide a durable bond on leather. Not recommended as a genuine adhesive for leatherwork.
General craft and household glues — Gorilla Glue, fabric glue, and similar products are not designed for leather. Gorilla Glue expands as it cures, which can create gaps in the bonded joint. Fabric glue does not bond leather reliably. These are last-resort options at best.
Preparing the Surface — The Step Most Beginners Skip
No adhesive bonds well to a surface it cannot grip.
This sounds obvious. In practice it gets skipped constantly, and it is one of the most common reasons glue fails — not the product, not the technique, but the surface underneath.
The rule is simple: the surface must be clean. Dust, dried compound, old finish, or any residue will compromise the bond regardless of which adhesive you use. Wipe the surface down before you apply anything.
Beyond cleanliness, there is a more important consideration — grain side versus flesh side. Flesh side is the rough inner surface of the leather. Adhesive grips it naturally. Grain side is the smooth outer surface. Adhesive does not grip a smooth surface well. If one or both of your bonding surfaces are grain side, you need to roughen them first. A light scuff with sandpaper gives the adhesive something to key into. It does not need to be aggressive — just enough to break the smooth surface. Skip this step and the bond will be weak regardless of how carefully you apply the glue.
Leather is used in everything from handcrafted wallets to car seats to sofa repairs — and the question of which glue to use comes up across all of it. This guide covers the full range: from quick household fixes through to the proper adhesives used by leatherworkers in the workshop every day.
Leather is used in everything from handcrafted wallets to car seats to sofa repairs — and the question of which glue to use comes up across all of it. This guide covers the full range: from quick household fixes through to the proper adhesives used by leatherworkers in the workshop every day.
Fiebing’s Leather Cement
Fiebing’s Leather Cement is a wet-application cement. You apply it to one or both surfaces and bring them together while the adhesive is still tacky — sometimes still wet. It takes time to fully cure, and during that window the leather can still be repositioned if something does not sit right.
That forgiveness is its biggest strength. For a beginner still learning how panels line up, or anyone working on a complex build where alignment needs to be adjusted, that working time is genuinely valuable. You are not committed the moment surfaces touch.
Apply it evenly, avoid pooling at edges, and let it tack before bringing surfaces together. Work cleanly — it does not respond well to being rushed.
Fiebing’s Leather Cement — 118ml and 946ml
Leather is used in everything from handcrafted wallets to car seats to sofa repairs — and the question of which glue to use comes up across all of it. This guide covers the full range: from quick household fixes through to the proper adhesives used by leatherworkers in the workshop every day.
Leather is used in everything from handcrafted wallets to car seats to sofa repairs — and the question of which glue to use comes up across all of it. This guide covers the full range: from quick household fixes through to the proper adhesives used by leatherworkers in the workshop every day.
Contact Adhesive — How It Works
Contact adhesive works on a different principle entirely. You apply it to both surfaces and allow it to air dry completely — not just touch dry, but fully dry. Then you bring the surfaces together. The moment they meet, the bond forms. There is almost no working time and very little forgiveness.
That sounds like a disadvantage. In practice, for an experienced maker working deliberately, it is a strength. When both surfaces are dry and you bring them together with confidence and accuracy, the bond is immediate and extremely strong. No slipping, no shifting, no waiting.
The key word is deliberately. You need to know exactly where each surface is going before they meet. If you are still working out alignment as you press layers together, contact adhesive will punish you for it.
Renia makes several Aquilim formulations. The 315 is the established water-based neoprene adhesive — universal across many materials and well known in the trade. The 330 is the newer development and the one I’d recommend for leathercraft — it bonds faster on leather and absorbent materials, holds stronger, and has an open time of up to 8 hours which gives you real working flexibility. The GL is formulated specifically for bond-then-sew work — the adhesive film stays flexible when dry so the needle passes cleanly through bonded layers. It is repositionable after joining, which is useful when alignment needs correcting before you sew. The SG is single-side application, designed for holding leather in place before sewing rather than as a permanent structural bond. For most leatherwork, 330 is where I’d start.
Renia Aquilim contact adhesives at Hideout Craft
Leather is used in everything from handcrafted wallets to car seats to sofa repairs — and the question of which glue to use comes up across all of it. This guide covers the full range: from quick household fixes through to the proper adhesives used by leatherworkers in the workshop every day.
Leather is used in everything from handcrafted wallets to car seats to sofa repairs — and the question of which glue to use comes up across all of it. This guide covers the full range: from quick household fixes through to the proper adhesives used by leatherworkers in the workshop every day.
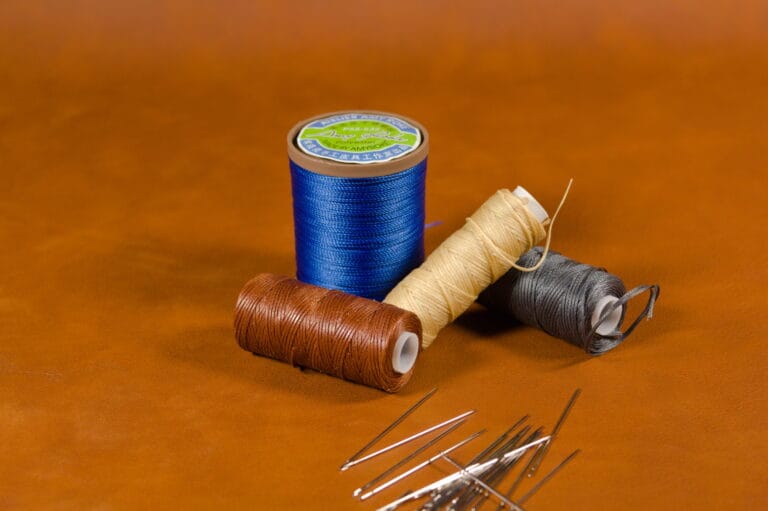
Application and Pressing
Regardless of which adhesive you use, how you apply pressure after bonding matters. I use a stitch hammer — a flat face pressed firmly across the seam seats the layers properly and removes any air gaps. Quick, controlled, consistent pressure without risk of distortion.
Flat-nose pliers work well too, particularly in tighter areas where a hammer face is awkward. A roller is useful on longer seams. The goal is even, firm pressure — not force.
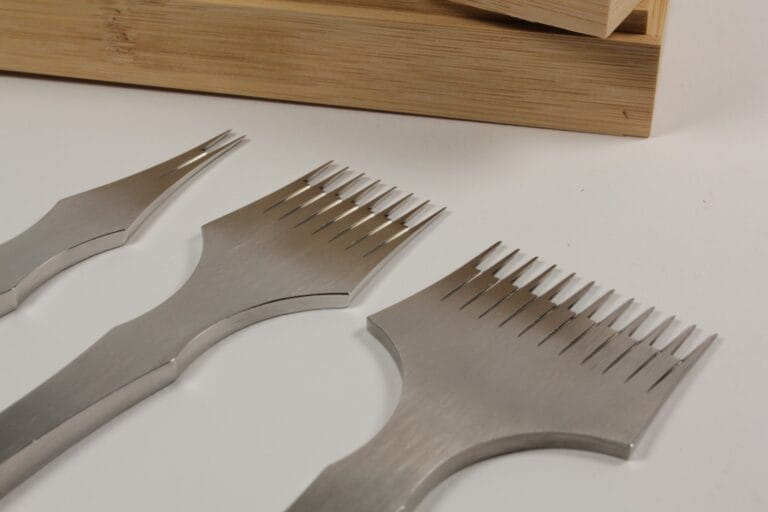
Stainless steel glue spreader set
Leather is used in everything from handcrafted wallets to car seats to sofa repairs — and the question of which glue to use comes up across all of it. This guide covers the full range: from quick household fixes through to the proper adhesives used by leatherworkers in the workshop every day.
Leather is used in everything from handcrafted wallets to car seats to sofa repairs — and the question of which glue to use comes up across all of it. This guide covers the full range: from quick household fixes through to the proper adhesives used by leatherworkers in the workshop every day.
Common Mistakes
Applying to an unprepared grain side surface. No adhesive bonds reliably to smooth leather that has not been roughened. Prime it first — always.
Applying to a dirty surface. Dust or old compound between the adhesive and the leather means the adhesive is bonding to contamination rather than leather.
Applying too much. Excess adhesive squeezes out at the edge when pressure is applied and is difficult to clean up cleanly.
Not allowing full dry time with contact adhesive. It must be completely dry before surfaces meet — no exceptions. Hold a clean piece of paper against the surface; if it does not stick, the adhesive is dry enough.
Stitching through poorly cured adhesive. It drags and distorts. Give it time.
Leather is used in everything from handcrafted wallets to car seats to sofa repairs — and the question of which glue to use comes up across all of it. This guide covers the full range: from quick household fixes through to the proper adhesives used by leatherworkers in the workshop every day.
Leather is used in everything from handcrafted wallets to car seats to sofa repairs — and the question of which glue to use comes up across all of it. This guide covers the full range: from quick household fixes through to the proper adhesives used by leatherworkers in the workshop every day.
Which Should You Use?
If you are newer to the craft and still developing your eye for alignment — reach for Fiebing’s Leather Cement. The working time gives you room to correct without penalty.
If you are comfortable with your build process and want a more aggressive, immediate bond — contact adhesive rewards that confidence.
Most experienced makers have both on the bench and choose based on the project. The stitching is what holds the piece. The adhesive is what holds it still long enough to stitch it properly.
Leather is used in everything from handcrafted wallets to car seats to sofa repairs — and the question of which glue to use comes up across all of it. This guide covers the full range: from quick household fixes through to the proper adhesives used by leatherworkers in the workshop every day.
Leather is used in everything from handcrafted wallets to car seats to sofa repairs — and the question of which glue to use comes up across all of it. This guide covers the full range: from quick household fixes through to the proper adhesives used by leatherworkers in the workshop every day.
Frequently Asked Questions
What is the best glue for leathercraft?
It depends on the project and your experience level. Fiebing’s Leather Cement is forgiving and repositionable — well suited to complex builds and beginners. Contact adhesive such as Renia Aquilim bonds instantly and holds firmly — better for experienced makers working with confidence. Most leatherworkers keep both on the bench.
Do I need to roughen leather before gluing?
You need to roughen any grain side surface before applying adhesive. The smooth grain surface does not give adhesive enough to grip. A light scuff with sandpaper is sufficient — just enough to break the surface. Flesh side does not need roughening.
How long does leather cement take to dry?
Fiebing’s Leather Cement should be allowed to tack before bringing surfaces together — typically a few minutes at room temperature. Full cure before stitching takes longer. Do not stitch through cement that is still soft or wet.
Does leather glue replace stitching?
No. Adhesive in leathercraft holds layers in alignment while you mark, punch, and stitch. It is not a substitute for stitching — it is the step that makes clean stitching possible. The thread provides the structural strength of the seam.
What is the difference between leather cement and contact adhesive?
Leather cement is applied and bonded while still tacky — it gives a working window for repositioning. Contact adhesive is applied to both surfaces, allowed to dry fully, then bonded on contact — the bond is immediate with virtually no repositioning time. Both suit different workflows and experience levels.
Is Gorilla Glue good for leather?
Generally no. The standard expanding formula creates gaps in the bonded joint as it cures — not what you want in a tight seam. The super glue version can serve as a quick fix for a very small, rigid repair, but it dries hard and will not hold up on anything that flexes. A leather-specific cement or contact adhesive will always be the better choice.
Can I use PVA glue on leather?
PVA has a very light hold on leather and will not provide a lasting bond. It can temporarily position pieces before sewing in a pinch, but treat it as a last resort rather than a proper adhesive. Leather cement or contact adhesive will do the same job properly.
Does fabric glue work on leather?
Not reliably. Leather’s surface — particularly the grain side — and its natural oils prevent fabric adhesives from forming a durable bond. It may hold briefly, but it is not an adequate substitute for a leather-specific product.
Can I use super glue on leather?
For a very small rigid fix, yes — super glue can work in an emergency. For anything that moves, bends, or needs to look clean, no. It dries brittle, may crack under flex, and can leave white residue on darker leather. Use it only where nothing better is available.
What glue do professional leatherworkers and cobblers use?
Contact cement — applied to both surfaces, dried, then bonded on contact. Fiebing’s Leather Cement is widely used for traditional leathercraft. For a stronger, more immediate bond, contact adhesive such as Renia Aquilim is the professional choice. The principle is the same across both: properly prepared surfaces, even application, and firm pressure after bonding.