
Leather Adhesives: Choosing the Right Glue
Quick answer: For most hand leatherwork, a contact adhesive is the right choice — applied to both surfaces, allowed to become tacky, then pressed firmly together. Renia Aquilim 315 suits general assembly work; Aquilim 330 for maximum bond strength; Aquilim GL where the seam passes through the bonded area — the flexible film lets the needle pass cleanly. Browse our full range of leather adhesives to see what is currently in stock. Fiebing’s Leathercraft Cement is a reliable starting choice for beginners. Apply thin and even to both surfaces; over-application does not improve the bond.
Adhesives are used in leathercraft for two main purposes: holding layers in position before stitching, and creating permanent bonds in construction that rely on glue rather than — or alongside — stitching. The right adhesive depends on what you are trying to achieve, the leather you are working with, and how the piece will be used.
This guide covers the main adhesive types used in hand leatherwork and how to choose between them.
Contact adhesives
Contact adhesives are the most widely used type in serious leathercraft. They are applied to both surfaces, allowed to dry or become tacky, and then the two surfaces are brought together and pressed firmly. The bond forms on contact — which is where the name comes from — and does not require clamping time.
The key characteristic of contact adhesives is that the bond is immediate. This is useful because it means you can continue working without waiting. It also means you need to position the pieces correctly before bringing them together, as repositioning after contact is not possible.
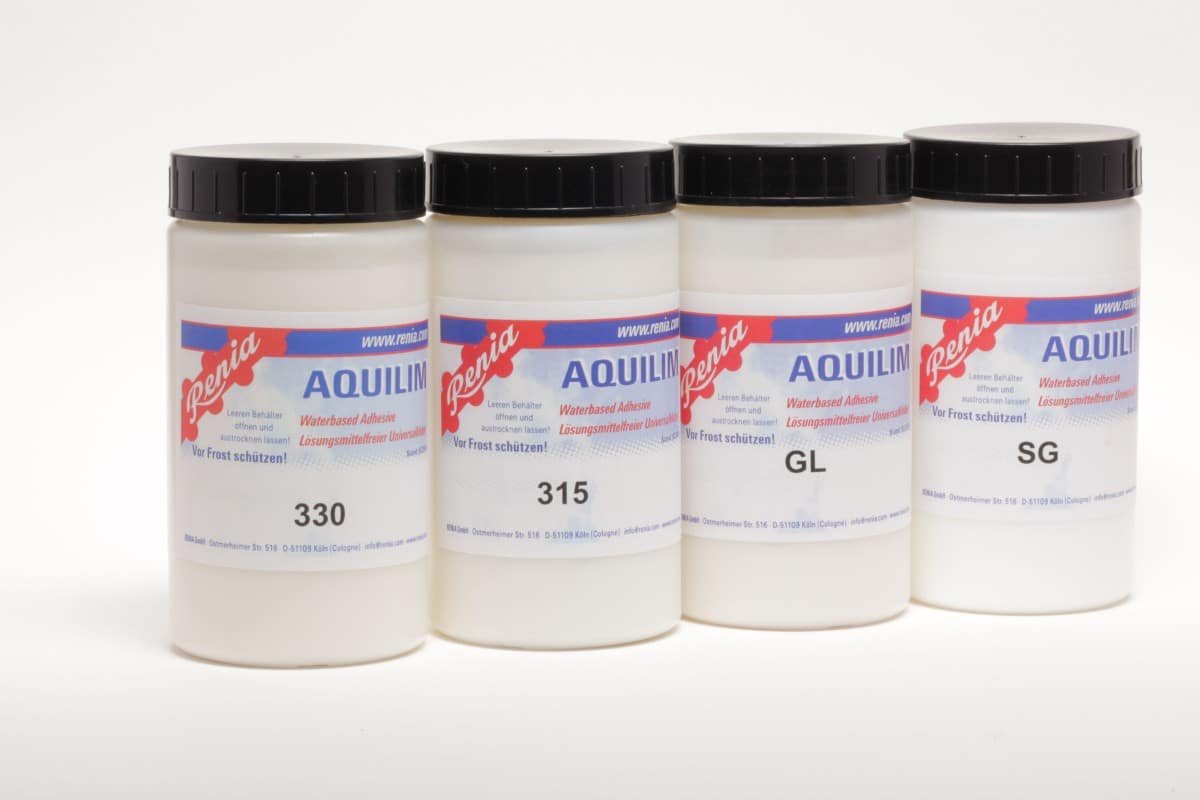
Renia Aquilim is a professional-grade range of contact adhesives developed for leather and footwear use. The range includes several formulations suited to different applications:
- Aquilim 315 is a general-purpose contact adhesive with a strong, reliable bond suited to most leathercraft assembly work.
- Aquilim 330 is Renia’s newer formulation and our lead recommendation — on leather and other absorbent materials it builds bond strength faster than 315 and holds stronger, with a working open time of up to 8 hours.
- Aquilim SG is a positioning adhesive, not a permanent bond. Apply to one surface only — it stays fully repositionable so you can peel apart and realign as many times as needed. The stitch does the structural work; SG holds everything in position while you get there.
- Aquilim GL is designed for bond-then-sew work. The adhesive film stays flexible once cured, so the needle passes through cleanly and stitch channels stay open. Fix the parts together within 1–5 minutes of application, and multiple removal and correction of the bonded parts is possible.
Aquilim GL and SG may be applied to one side only on absorbent materials. Follow the current Renia instructions for preparation and joining time, and test the actual material combination before working on the finished piece. Aquilim 315 and 330 are applied to both parts of the material combination according to their technical sheets.
Storage — the one rule you cannot ignore. Aquilim 330, 315 and SG must be stored above 4°C at all times; Aquilim GL should not be stored or shipped below 10°C. This applies to transport as well as storage. Freezing destroys the emulsion and a frozen jar cannot be recovered — it must be discarded. Do not leave Aquilim in an unheated garage, outbuilding, or vehicle in winter. Keep the lid tightly closed between uses; exposure to air causes skinning on the surface. If skinning occurs, skim it off carefully before use — do not mix it back in.
Contact adhesives of this type require proper surface preparation. Both surfaces should be clean, dry, and free from oils, wax, or finishes. On the flesh side of leather, some light roughening with sandpaper improves adhesion. On the grain side, a deglazer removes surface treatments before gluing. One important point: water-based adhesives like Aquilim are less forgiving of contamination than solvent-based cements, not more. Remove dust, grease, wax and any finishing products thoroughly before applying — surface preparation matters more here, not less.
Leathercraft cement
Fiebing’s Leathercraft Cement is a water-based adhesive suited to general leathercraft assembly and simpler projects. It is an accessible starting option for makers who want a straightforward leather adhesive. Follow the current Fiebing’s application instructions for coating, drying and pressure rather than treating it as a solvent-based cement.
It applies to both surfaces, is allowed to become tacky, and is then bonded by pressing the surfaces together. The working time and final bond strength are somewhat lower than professional contact adhesives, but it is a reliable choice for general use and a sensible starting point for beginners.
Water-based adhesives
Water-based adhesives have lower solvent content than traditional contact adhesives and are a practical choice where ventilation is limited or where working with solvent adhesives is not preferred. The bond characteristics differ slightly — water-based adhesives often require longer drying time before contact and may not produce quite the same immediate bond strength as solvent-based options.
Renia Aquilim GL is the bond-then-sew option in the Aquilim range. The cured adhesive film stays flexible so the needle passes through cleanly without dragging or closing stitch channels — use it whenever the seam runs through the bonded area.
Application principles that apply to all adhesives
Regardless of the adhesive type:
- Apply in thin, even coats to both surfaces. Over-application does not improve the bond and can cause the adhesive to squeeze out of the joint under pressure.
- Allow each surface to reach the correct state — tacky for contact adhesives — before joining. Follow the product guidance.
- Once bonded, apply firm, even pressure to the joint. A seam roller or a firm palm press works well for flat joins.
- Keep the adhesive off areas you do not want bonded — particularly stitch zones where glue in the holes can make stitching harder.
- Work in an adequately ventilated space with solvent-based adhesives.
- Cold workshops. Aquilim thickens in cold conditions, dries slower, and bond formation can be affected. If the adhesive has been stored somewhere cold, bring it to room temperature before use. A warm water bath is fine; never use a direct heat source on the container.
- Switching from solvent cement. If you are moving from a traditional solvent contact cement to a water-based adhesive, give yourself a session on test pieces first. The drying behaviour and bond formation feel different. Surface preparation becomes more critical. Once you have adjusted your technique the results are comparable or better — but the adjustment is real and worth taking seriously before working on a finished piece.
Which adhesive to choose
For most leathercraft assembly — wallets, bags, structured pouches, belts — a contact adhesive in the Renia Aquilim range gives professional results. Choose Aquilim 315 for general work, 330 where maximum bond strength is needed.
For simpler projects, starting out, or situations where a large investment in adhesive is not yet justified, Fiebing’s Leathercraft Cement is a practical and accessible choice.
If the seam passes through the bonded area, use Aquilim GL — the flexible adhesive film lets the needle pass cleanly and keeps stitch channels open.
Frequently asked questions
What glue do you use for leathercraft?
Contact adhesive is the standard for most leathercraft work. Renia Aquilim is the professional-grade range — Aquilim 315 for general assembly, 330 for maximum bond strength, GL where the seam passes through the bonded area. Fiebing’s Leathercraft Cement is a reliable, accessible choice for beginners and simpler projects. Apply to both surfaces, allow to become tacky, then press firmly together.
What is the best leather glue for hand stitching preparation?
Any capable contact adhesive applied correctly. The role of glue before stitching is to hold the layers in position and prevent movement while you sew — not to create a permanent structural bond (the stitching does that). Aquilim 315 or Fiebing’s Leathercraft Cement both work well for this purpose. Apply thin, keep glue away from the stitch holes, and allow to tack off properly before pressing layers together.
How do you apply leather contact adhesive?
Apply a thin, even coat to both surfaces being joined. Allow both surfaces to reach the correct tacky state — follow the product guidance on drying time. Then bring the surfaces together and press firmly with even pressure. A seam roller or firm palm press helps seat the bond on flat joins. Do not over-apply; more adhesive does not improve the bond and can cause squeeze-out at the edges.
Does leather glue work on all leather types?
Contact adhesive works best on clean, untreated surfaces. It bonds well to the flesh side of vegetable-tanned leather and to lightly prepared grain surfaces. Oily leather, leather with heavy surface treatments, or leather with wax finishes may not bond well without degreasing or roughening the surface first. A light sanding of the flesh side and a deglazer on difficult grain surfaces improve adhesion on most leather types.