Making a Simple Leather Belt: Tools, Hardware, and Workflow
Quick answer: Making a leather belt requires firm vegetable-tanned leather at 3–4mm, a buckle matched to the strap width, and core skills: cutting, edge finishing, hole punching, and stitching. The key sequence is cut the strap, pre-finish the long edges before assembly, cut the buckle tongue slot, attach and stitch the buckle fold, punch the adjustment holes at even spacing, and add a keeper loop. Finishing the edges before the buckle is attached saves significant time and effort.
A leather belt is one of the most practical projects in hand leatherwork. The dimensions are straightforward, the skills involved are core to the craft, and the result is something that actually gets used. It also teaches cutting over length, consistent hole punching, buckle attachment, and edge finishing on a longer run — all of which are useful to develop.
This guide covers the tools, hardware, and sequence for making a simple, well-made leather belt.
Leather for a belt
The right leather for a belt is firm vegetable-tanned hide, in a thickness that suits the intended use. A general-purpose personal belt typically works well at around 3–4mm. A dress belt might be thinner; a heavy-duty utility belt might be thicker. The leather needs to hold its shape, resist bending at unintended points, and take edge finishing cleanly.
The strap width determines the buckle size needed. In general, common belt widths run from around 25mm through 32mm and 38mm — the most widely used sizes for personal belts — up to 45mm (1¾″) and above for heavier utility and work belts, with further sizes available beyond this typical range. Always check the exact bar width of your chosen buckle against your cut strap width before proceeding.
Tools needed
– Strap cutter (we stock the Kevin Lee beech strap cutter) or ruler and sharp knife for cutting the strap to width
– Metal straight edge and snap-off knife for length trimming
– Wing divider or edge marker for the stitch line
– Pricking iron and mallet for the buckle fold stitch holes
– Harness needles and thread for stitching the buckle fold
– Glue for securing the buckle fold before stitching
– Round hole punch sized for the buckle tongue holes
– Edge beveller
– Wet and dry sandpaper
– Burnishing tool and Tokonole or Gum Tragacanth for edge finishing
– Rivet setter or Chicago screw tool if using these for the buckle attachment
Hardware needed
– Belt buckle in the correct bar width for your strap
– Keeper loop (a small leather or metal loop to hold the strap tail after it passes through the buckle)
– Optionally: a rivet or Chicago screw to reinforce or replace the stitched fold at the buckle
The workflow
1. Cut the strap to width and length. Cut the strap to the correct width using a strap cutter or ruler and knife. The strap length should be long enough for the size range needed, typically around 100–110cm before folding for a general adult belt. The tail end — the end that passes through the buckle — can be cut square or to a pointed or rounded tip.
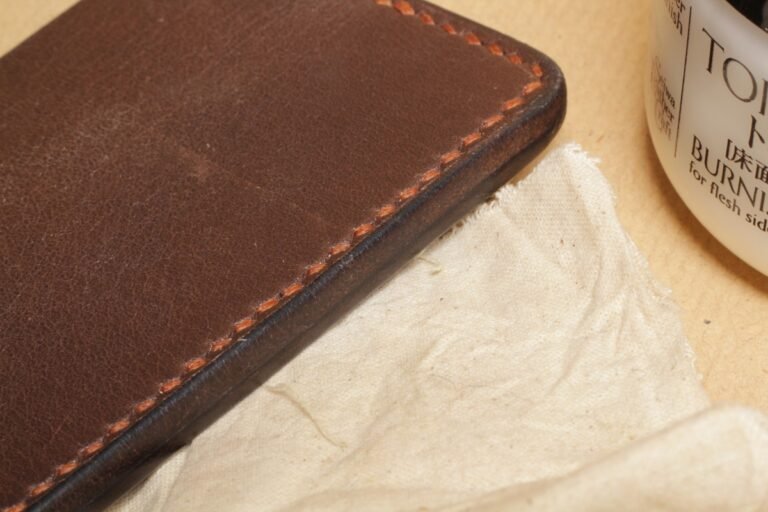
2. Bevel and pre-finish the edges. Bevel both long edges with an edge beveller and sand thoroughly with wet and dry paper before any assembly begins. It is significantly easier to finish the long edges at this stage than after the buckle has been attached. Apply Tokonole or Gum Tragacanth and burnish the edges to a smooth finish.
3. Cut the buckle tongue slot. At the buckle end of the strap, cut or punch the slot through which the buckle tongue will pass. This is a rectangular slot, typically made with a punch and then cut between two punched holes, positioned far enough from the fold end to allow the fold to wrap around the buckle bar.
4. Attach the buckle. Fold the leather over the buckle bar and glue the fold in position. Allow to dry properly. Mark a stitch line across the fold and punch stitch holes with the pricking iron. Saddle stitch through the fold firmly and finish the thread ends cleanly. Alternatively, secure the fold with a Chicago screw or rivet if preferred over stitching.
5. Punch the adjustment holes. Measure and mark the belt holes at even spacing across the adjustment zone — typically five holes at approximately 25mm intervals for a general belt, centred at the most likely wearing position. Punch cleanly with the round hole punch on a rubber punching surface.
6. Add a keeper. A keeper loop sits on the strap behind the buckle to hold the tail of the belt neatly in use. This can be a separate short piece of leather riveted or stitched around the strap, or a strip cut from the same strap material.
7. Final edge and tip finishing. Finish the tip end of the strap cleanly — bevel the corners if it has been cut to a point, sand, and burnish. Check the full length of both edges and any areas that were missed during the initial finishing.
A note on quality
A well-made belt should hold its shape, have consistent edges, clean holes, and a buckle attachment that is genuinely secure. The fold at the buckle is a stress point — it should be stitched or secured firmly, with the glue doing its job and the thread properly tensioned throughout.
A belt that is made carefully and from the right leather will last significantly longer than one rushed through. The extra time spent on edge finishing and hole consistency is visible every time it is worn.
Frequently asked questions
How do you make a leather belt by hand?
Cut a strap of firm vegetable-tanned leather to the correct width and length. Bevel and finish the long edges before assembly. Cut the tongue slot at the buckle end, fold the leather over the buckle bar, glue and stitch the fold. Punch five adjustment holes at even spacing across the centre zone. Add a keeper loop and finish the tip end. Edge finishing done before the buckle is attached is significantly easier.
What leather do you use to make a belt?
Firm vegetable-tanned leather at 3–4mm is the standard for a general personal belt. It holds its shape, resists bending at unintended points, and takes edge finishing well. Thinner leather suits dress belts; thicker suits heavy-duty and utility belts. Chrome-tanned leather is softer and less suitable for belts that need to hold their form.
What tools do you need to make a leather belt?
The core tools are a strap cutter or ruler and sharp knife for cutting to width, an edge beveller, wet and dry sandpaper, a burnishing tool and edge compound for finishing, a wing divider for the stitch line, a pricking iron and mallet for stitch holes, saddle stitching needles and thread, a round hole punch for adjustment holes, and glue for the buckle fold. A mallet is needed throughout.
How do you attach a belt buckle to a leather strap?
Cut a rectangular tongue slot near the folding end of the strap for the buckle tongue to pass through. Fold the leather over the buckle bar, apply glue to the fold, and allow it to dry properly. Mark and punch a stitch line across the fold, then saddle stitch through both layers. Alternatively, secure the fold with a Chicago screw or rivet. The fold sees repeated tension in use and must be firmly secured.