Complete Guide to Traditional Saddle Stitching
Saddle stitching is the foundation of traditional leatherwork.
Before machines, every strap, saddle, and case was stitched by hand. Properly executed saddle stitching is not decorative — it is structurally superior. If one stitch fails, the rest of the seam remains secure. This is why it remains the standard for serious leathercraft, and why pieces built this way can last decades of hard use.
Before focusing on stitch technique, it is worth making sure you understand how leather choice and thickness affect the seam. Our guide on the traditional approach to hand stitching leather covers that foundation in detail.
What Is Saddle Stitching?
Saddle stitching uses two needles and one continuous thread to form a locking stitch in each hole. Each needle passes through the same hole from opposite sides. The thread locks in the centre of the leather, creating strength that machine stitching cannot replicate.
If a machine stitch breaks, the seam can unravel along its length. If a saddle stitch breaks, only that single stitch is affected — the seam holds on either side of it. For anything that sees regular mechanical stress — belts, straps, bag handles, load-bearing seams — that structural difference is meaningful.
Tools Required
Good stitching begins with correct preparation and the right tools.
Pricking irons create evenly spaced holes along the stitch line. The Kevin Lee pricking irons I stock have taller handles than most, which gives a useful visual reference for keeping the iron perfectly vertical before striking. A vertical iron gives consistent hole angles. An angled iron gives an inconsistent seam.
An awl opens and angles each hole after punching. The awl controls how the stitch sits in the leather — the angle it enters at determines the angle of the finished stitch. Most beginners underestimate how much this single step affects the appearance of the finished seam.
Harness needles — blunt tipped, sized to suit the thread. I use John James size 002 and 004. Blunt tips are correct for saddle stitching — you are passing through a pre-punched hole, not piercing the leather. When the second needle passes through the same hole, it must slide past the first thread already sitting there. A sharp tip will pierce and split that thread rather than pass alongside it, weakening the stitch and creating inconsistency through the seam.
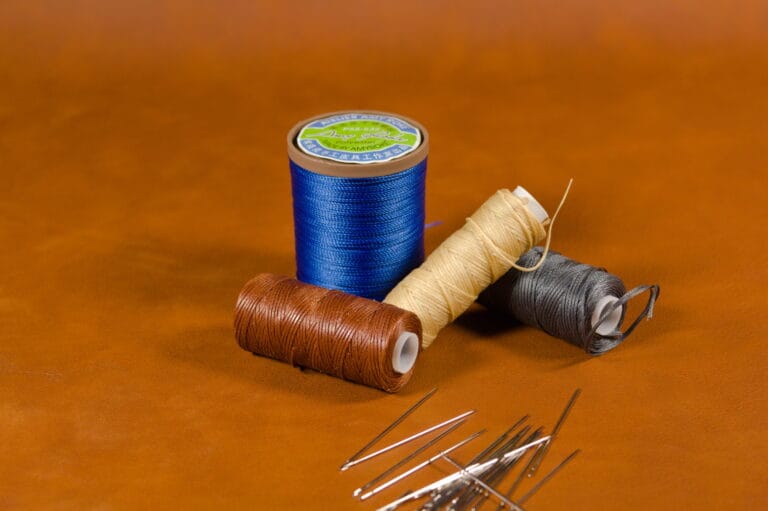
Waxed thread — linen for traditional builds, polyester for anything that needs to perform under hard use. A stitching pony to hold the work securely while both hands stitch. A maul for driving the irons cleanly.
Browse all stitching tools at Hideout Craft
Preparing the Stitch Line
This is the step that most beginners rush, and the one that most affects the quality of the finished seam.
First, scribe the stitch line with a wing divider — one leg running along the outer edge of the work, the other scribing a parallel line at a consistent distance, typically 3 to 5mm from the edge. The divider-drawn line follows the shape of the piece exactly. A line that echoes the edge looks intentional. A line ruled with a straight edge across a curved piece does not.
Then punch the holes. Set the iron on the stitch line, keep it perfectly vertical, and strike once cleanly with the maul. Move forward, overlapping one tooth with the last hole of the previous position. Use a 2-tooth iron on curves and corners, a longer iron on straight runs.
Then open and angle each hole with the awl. This is the step that separates a refined seam from a functional one. Same angle, same depth, same pressure — every hole. Work consistently and it shows in the finished seam.
Thread Length and Setup
Cut thread approximately 3.5 to 4 times the length of the seam you are stitching. Attach a needle to each end. Lock the thread by passing the needle through the thread itself about 4cm from the end, then pulling the short tail back tight against the needle eye. This prevents slippage under tension and keeps both ends secure throughout the seam.
The Stitching Method
Place the work in the stitching pony with the stitch line just above the jaw line. If you intend to backstitch at the start for extra security, begin at the second or third hole rather than the first — this gives you room to backstitch back toward the start, with both thread ends finishing at the back of the work rather than the face. For the first stitch, pass the front needle through your starting hole and centre the thread — equal length on both sides.
For each stitch thereafter: pass the front needle through the hole, then before pulling tight, lay the rear thread across the top of the front thread inside the hole. This controls which side the lock forms on and keeps the stitch direction consistent. Pass the rear needle through the same hole from the opposite side, passing over the front thread. Pull both threads evenly and firmly with consistent tension.
Consistent tension is everything. Each stitch pulled to the same firmness produces a seam where every stitch sits identically. Do not rush. The rhythm will develop naturally.
When hand position and tension control are the challenge, written explanation only goes so far. The saddle stitching demonstrations by Nigel Armitage are widely regarded as the best visual reference available — his breakdown of needle order, tension, and stitch angle is worth studying alongside practice.
A Word on Stitch Aesthetics
Beginner leathercraft videos often feature large, bold stitching — wide spacing, thick thread, pronounced holes. This is partly because it photographs clearly, and partly because it suits certain work — heavy builds, rustic pieces, saddlery where a robust appearance is the point.
But as your technique develops and your eye sharpens, you will start to want more control over what the seam looks like. Tighter spacing with finer thread produces a significantly more refined seam — the kind of stitching you see on quality European leather goods where the craftsmanship is evident but the seam does not dominate the piece.
Neither is better. They suit different work and different aesthetics. The choice of pricking iron and thread diameter is what gives you that control. Work out what you want the seam to look like before you start, then make sure your tools match that intention.
Finishing the Seam
To secure the end of a seam, backstitch two to three holes back along the seam with consistent tension. Trim the thread close to the surface. For polyester thread, lightly melt the trimmed end with a lighter and press flat immediately with a fingernail while still warm. For linen, trim close and either press firmly with a hammer to bed the fibres down, or work a small amount of beeswax into the trimmed end with your thumbnail — this seals the fibres without heat and suits linen particularly well. A properly finished seam end should be secure but unobtrusive.
Common Errors
Uneven tension — the most common, and the one that most affects finished seam appearance. Stitch at a pace you can maintain consistently.
Piercing the thread with the second needle — lay the rear thread over the front thread before passing the second needle to prevent this.
Skipping awl work — punching with the iron and stitching directly gives worse results than punching then awling every hole.
Rushing. Saddle stitching rewards rhythm and control. Speed comes after consistency, not before it.
Frequently Asked Questions
What is saddle stitching and why is it stronger than machine stitching?
Saddle stitching uses two needles and one thread to form an independent locking stitch in each hole. If a machine stitch breaks, the seam can unravel. If a saddle stitch breaks, only that single stitch is lost — the seam holds on either side. For leather goods under regular mechanical stress, this is a meaningful structural difference.
What tools do I need for saddle stitching?
Pricking irons, an awl, harness needles, waxed thread, a stitching pony, and a maul. A wing divider for scribing the stitch line. That is a complete stitching setup.
What thread size is best for saddle stitching?
For 3.85mm pricking irons, 0.55mm waxed polyester thread is a reliable choice for most leather weights. The thread should fill the hole cleanly — not be lost in it, and not force the needle through.
How do I keep saddle stitching even?
Consistent tension on every stitch — pulled to the same firmness each time. Consistent awl work — same angle and depth on every hole. Working at a rhythm you can maintain rather than rushing. These three things produce an even seam.
What is the correct stitch spacing for leathercraft?
3.85mm pitch is a reliable default for most work — wallets, bags, belts, and straps. For finer, more refined work, 2.7mm pitch with finer thread produces a noticeably more controlled appearance. For heavy-duty work where a bold character suits, wider spacing is appropriate. Match the spacing to the piece.
How do I finish the end of a saddle stitch seam?
Backstitch two to three holes back along the completed seam with consistent tension. Trim the thread close. For polyester, lightly melt the trimmed end and press flat while warm. For linen, trim close and press with a hammer. The finish should be secure and unobtrusive.
Why does my saddle stitching look uneven on one side?
Usually inconsistent tension or inconsistent pull direction. Both threads should be pulled with the same force in the same direction every stitch. Also check that the iron was kept vertical when punching — angled holes produce stitches that sit at different angles on each face of the leather.