Beginner’s Leathercraft Starter Guide
Quick answer: To start leathercraft you need a small set of quality tools covering cutting, stitching, and edge finishing — not a large kit. Begin with simple projects like key fobs and card holders, use vegetable-tanned leather, and focus on learning the process rather than completing impressive pieces. Quality over quantity at the start makes a significant difference to how quickly you improve.
Leathercraft is easier to understand when you stop thinking of it as a pile of tools and start thinking of it as a sequence of work. You measure, mark, cut, prepare edges, punch holes, stitch or glue, finish the edges, and fit hardware where the project needs it. A beginner does not need every tool on the bench from day one. A beginner needs enough good tools to learn that sequence cleanly.
The first mistake most people make is buying too broadly, too fast. A starter kit full of unrecognised tools looks reassuring until you try to use them. Many cheap sets include tools that are rough, blunt, or poorly made — and worse, tools you will not need for the first six months of work. That does not mean every beginner must spend heavily. It means the first tools should be chosen with a clear purpose.
Start with simple projects
Good first projects are not chosen because they look impressive. They are chosen because they teach the right habits. Key fobs, card holders, simple straps, notebook covers, and small pouches all teach control. They let you practise straight cuts, consistent stitch lines, glue control, and edge finishing without wasting large pieces of leather.
A simple project finished cleanly is worth more than a complicated project fought all the way through. Leather does not forgive rushed preparation well. A wandering cut affects the edge. Uneven stitch holes affect how the thread sits. A poorly prepared edge will not become crisp just because burnishing compound is applied at the end.
The first skills to build
The early skills are plain but important: cutting safely, marking accurately, keeping stitch holes consistent, matching thread and needle to the leather, and understanding how an edge changes as it is bevelled, sanded, and burnished. These are the habits that make later work easier and faster.
Do not judge progress only by the finished item. Look at the separate stages. Is the cut clean? Are the holes sitting straight? Is the thread running evenly? Is the edge smooth before you try to burnish it? That is where real improvement happens.
What belongs in a sensible starter setup
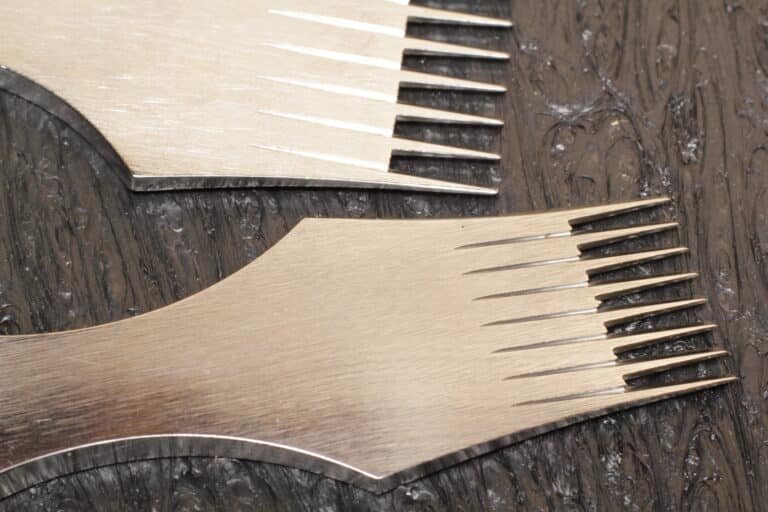
A practical beginner setup covers the core processes without over-complicating the bench. You will need something to cut with, something to mark a straight line with, a pricking iron or stitching chisel for making holes, harness needles, thread, glue, an edge beveller, a burnishing product, a maul or mallet, and a proper surface for cutting and punching on.
Each tool should earn its place. If it does not help you cut, mark, stitch, glue, finish an edge, or set hardware, it can wait.
The mindset that actually helps
Start smaller than your enthusiasm tells you to. Buy fewer tools, learn what they do, and build from there. Keep scrap leather for testing glue, stitch spacing, and edge finishing before doing it on the final piece. Practise the operation first.
Leatherwork rewards repetition. The aim at the start is not to own a perfect bench. The aim is to learn what clean, controlled work feels like — and then build on that.
A note on tool quality for beginners
There is a point where poor tools genuinely make learning harder. A blunt pricking iron leaves ragged holes. A badly balanced knife makes a clean cut more difficult. A rough edge beveller drags and tears rather than lifting cleanly. These are not small problems — they create bad habits and frustrating results that have nothing to do with your skill level.
You do not need the most expensive tools available. But tools that are properly made and properly finished will teach you the craft rather than fight you through it. Build the bench gradually, invest in quality where it matters most, and replace poor tools as you learn which ones are holding you back.
Frequently asked questions
Is leathercraft hard to learn?
Leathercraft is not difficult to learn, but it rewards careful preparation and consistent practice. The basic sequence — cutting, marking, punching, stitching, and finishing — can be learned from simple projects. Most frustration at the start comes from poor tools or skipping preparation steps, not from the craft being inherently hard.
What leather should a beginner start with?
Vegetable-tanned leather is the right starting point. It cuts cleanly, stitches well, responds predictably to tools, and finishes properly — which means your results will reflect your process rather than the material fighting you. Aim for a mid-weight around 1.5–2mm for your first projects.
How much does it cost to start leathercraft?
A practical beginner setup covering all core processes — cutting, stitching, and edge finishing — can be put together for a modest outlay if you are selective about what you buy first. The key is to invest in the tools you use most (a good pricking iron, proper needles, quality thread) and delay buying tools you do not yet need.
Do I need a starter kit to learn leathercraft?
Most starter kits bundle useful tools with tools you will not need for months, and the most-used tools in cheap kits are often the worst quality. A small selection of well-chosen tools is a better starting point than a large kit with uncertain quality — Kevin Lee tools and Artisan Soul thread are what we stock to build that kit properly.