The Traditional Approach to Hand Stitching Leather
There is something about stitching leather by hand that slows the mind down.
It demands patience. It does not reward rushing. You sit, you mark, you pierce, you pull thread through one stitch at a time. There is rhythm to it, and once you find it, the work becomes almost meditative.
I do not use a sewing machine in my own work. Not because machines are wrong — they are efficient, consistent, and have their place — but because I am drawn to the traditional method. Hand stitching keeps me close to the material. It forces me to understand what the leather is doing rather than overpowering it.
When I first started, I made many mistakes. Crooked lines. Uneven tension. Poor skiving. But the biggest confusion was not stitching technique. It was leather.
Understanding Leather Before You Thread a Needle
In the beginning, I struggled to tell the difference between vegetable-tanned leather and chrome-tanned leather. I bought what looked good, or what was affordable, and only later realised that different leathers behave very differently once you start cutting and stitching.
That early confusion is common. If you want to learn traditional hand stitching properly, the leather you choose matters more than most people realise.
Why Beginners Should Start with Vegetable-Tanned Leather
Vegetable-tanned leather behaves in a way that teaches you. It marks clearly with a wing divider. It cuts cleanly when your blade is sharp. It holds a stitch line. It burnishes. It develops patina over time.
When you pierce it with an awl or iron, the hole keeps its shape. The thread sits where it should. The leather firms slightly around the stitch and supports it. For someone learning, that predictability is important.
Chrome-tanned leather is softer and often more flexible, but it behaves differently. It does not burnish in the same way. It does not darken naturally when worked. Stitches can look inconsistent even when your technique is improving. Edges may refuse to behave.
That does not make chrome-tanned leather inferior. It simply makes it less forgiving when you are trying to understand the fundamentals. Vegetable-tanned leather shows you your mistakes clearly — frustrating at first, but invaluable in the long run.
Choosing the Right Thickness
Most beginners do not own a leather splitter. That means choosing the correct thickness from the start is important — you cannot easily correct it later.
Thickness affects more than strength. It influences how the stitch sits visually, how the leather folds, whether edges become bulky, and how forgiving the spacing appears.
For small goods such as card holders or slim wallets, around 1.2 to 1.6mm is often manageable. For slightly more structured pieces, 1.6 to 2.0mm works well. Belts and load-bearing pieces may sit closer to 3.0 to 3.5mm depending on the design.
If the leather is too thick, stitching becomes forced and heavy. If it is too thin, the piece can feel weak or collapse at the edges. You cannot fix poor thickness choice with better thread. The foundation has to be right.
Hand Stitching Is Not Just About Stitching
Most people jump straight to asking how to saddle stitch. I did the same.
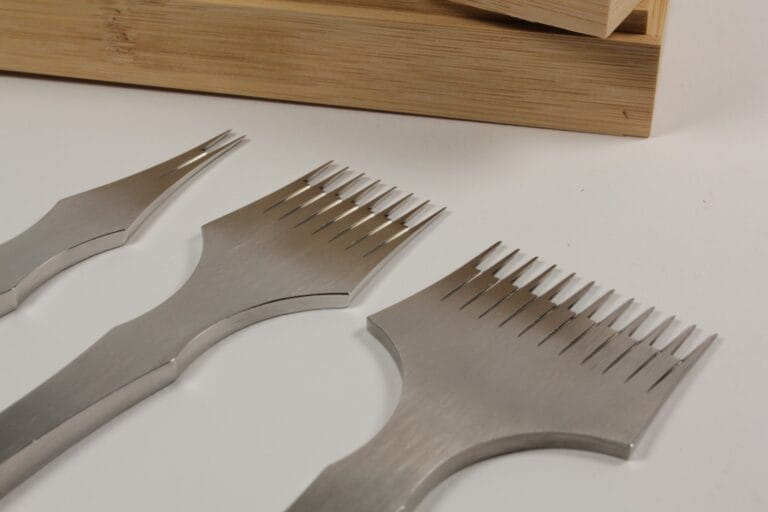
But stitching is only one part of the craft. It is the visible part — the bit everyone notices — but it sits on top of everything else. Before you can stitch well, you need to be able to make an accurate pattern, cut straight and cleanly, mark a consistent stitch line with a wing divider, use a pricking iron correctly, skive where it is needed, and keep your blade sharp.
If your pattern is even slightly out, the stitching will expose it. If your edge is not straight, your spacing will look uneven no matter how careful you are. And if your blade is dull, you will fight the leather instead of working with it. A dull blade is both dangerous and destructive.
Blade maintenance is not optional. Stropping becomes part of the routine.
Stitch Spacing — Finding What Looks Right for the Work
There is no single correct stitch spacing, and this is something that takes time to develop an eye for.
If you have watched beginner leathercraft videos you will have noticed that a lot of them feature large, bold stitching. Wide spacing, thick thread, pronounced holes. That is partly because it photographs and films well, and partly because some pieces genuinely suit that bold, rustic character. Heavy-duty work, saddlery, items where robustness is the point — bold stitching belongs on those.
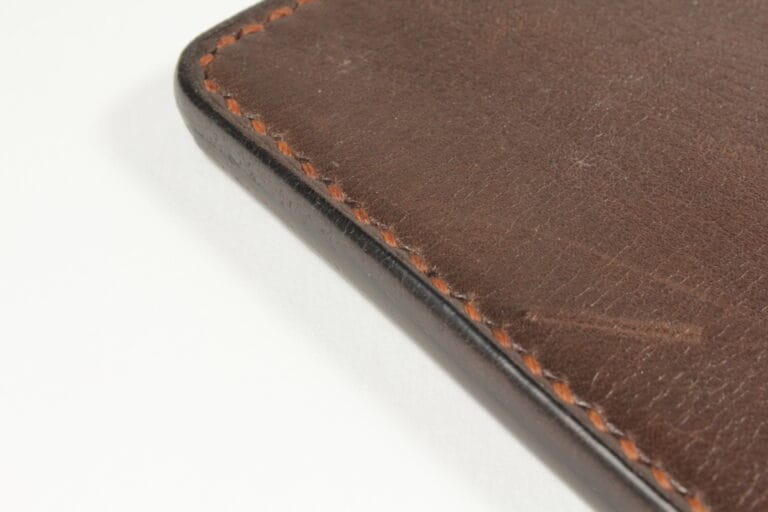
But as you develop your technique and your eye, you will start to see that different spacing and thread combinations produce very different aesthetics. Finer spacing with correspondingly finer thread produces a more controlled, refined seam. The kind of stitching you see on quality handmade goods where the seam is present but not the dominant feature.
There is no right answer. It is personal, and it should match the piece. A heavy belt might suit bold stitching. A slim card wallet might suit something much finer. The iron spacing and thread diameter are what give you that control.
Lay a test strip on your bench. Stitch a sample. Step back and look at it from a distance. Does it feel balanced? Does it match the scale and character of the piece you are building? That answer matters more than copying someone else’s preference.
Skiving — The Skill That Changes Everything
Skiving is one of the least glamorous skills and one of the most important.
Poor skiving leads to bulky folds, uneven layers, and difficult stitching. Clean skiving allows leather to fold naturally and layers to sit properly against one another. It takes practice. You will ruin pieces learning this — that is normal.
Keep your blade sharp. Work slowly. Learn how the leather thins under the blade rather than forcing it. Once you understand skiving, construction improves dramatically.
Kevin Lee full-tang skiving knife at Hideout Craft
Edge Finishing Comes After the Fundamentals
Beginners sometimes become preoccupied with perfect edges before they have mastered straight stitching or proper leather selection. Edges matter. But they are the final stage.
If your patterns are accurate, your cuts are clean, your layers are skived correctly, and your stitching is straight, edge finishing becomes far simpler. Good edges are usually the result of good preparation — not a separate skill that sits apart from everything else.
Why I Continue to Stitch by Hand
Hand stitching is slower. It will not compete with factory production speeds.
But it produces strong, repairable seams and visible craftsmanship. More importantly, it reinforces patience. You cannot rush hand stitching without seeing the result in the seam.
Traditional craft is not about nostalgia. It is about control, longevity, and understanding the material fully before asking it to perform.
Frequently Asked Questions
What leather should a beginner use for hand stitching?
Start with vegetable-tanned leather. It marks clearly, cuts cleanly, holds a stitch line, and burnishes well. It is predictable and teaches you correctly. Chrome-tanned leather is less forgiving for beginners and can mask technique issues rather than revealing them.
What thickness of leather is best for hand stitching?
It depends on the project. For small goods like wallets and card holders, 1.2 to 1.6mm is manageable. For bags and more structured pieces, 1.6 to 2.0mm works well. Belts and load-bearing straps typically suit 3.0 to 3.5mm. Too thick makes stitching forced and heavy. Too thin makes the piece weak at the edges.
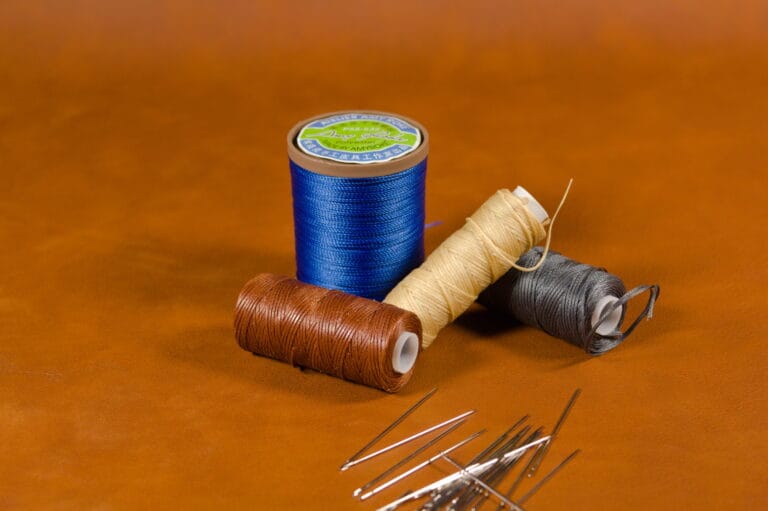
What tools do I need to start hand stitching leather?
The essentials are a pricking iron, an awl, a sharp knife, waxed thread, harness needles, a stitching pony, an edge beveller, and a burnishing compound. Add a wing divider early — it is essential for consistent stitch lines and most people add it too late.
Is saddle stitching difficult to learn?
The stitch itself is straightforward to learn — two needles, one thread, one stitch at a time. The challenges are consistency: maintaining even tension across a long seam, keeping the iron perfectly vertical, and developing the patience to work at the pace the craft demands. The technique is accessible. The mastery comes with repetition.
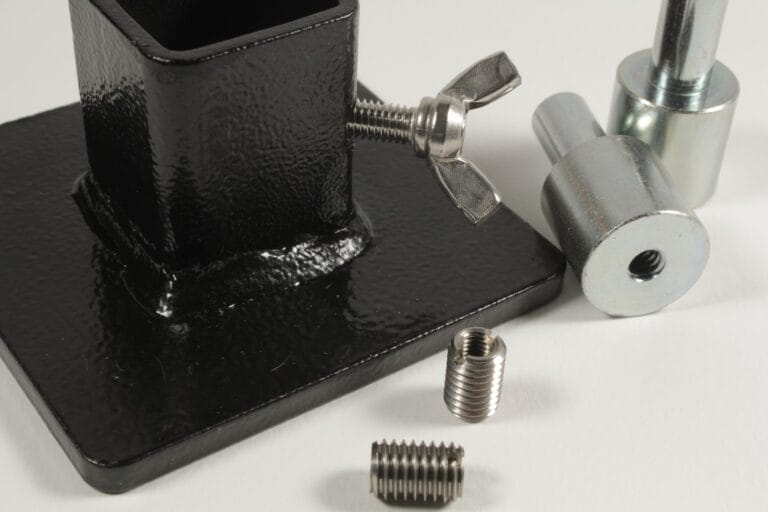
How do I keep my stitch line straight?
Use a wing divider to scribe the stitch line before the iron goes near the leather. Do not freehand it. The divider follows the edge of the leather and produces a line that echoes the shape of the piece — consistent, repeatable, and far more accurate than a ruler or freehand marking.