Simple Leather Projects for Building Core Skills
Quick answer: The best beginner leather projects are key fobs, card holders, simple straps, and notebook covers. These are not chosen because they look impressive — they are chosen because they teach the skills that matter: clean cutting, consistent stitching, and proper edge finishing. A key fob done cleanly teaches more than a bag done badly.
The best early leathercraft projects are not chosen because they look impressive. They are chosen because they teach the habits and techniques that make every later project easier. A key fob done cleanly teaches more than a bag done badly.
This guide is not a project how-to. It is about how to think about early project choices so that you are building skill with every piece you make, not just hoping for a good result.
Why simple projects matter
Simple projects keep the focus on the work rather than the complexity of the design. When a project has one main panel, a few edges, and a stitch line or two, you can give proper attention to how straight your cut is, how consistent the stitch spacing is, whether the edge is properly prepared before burnishing, and how the layers sit together.
Add too much complexity too soon and the lesson gets buried in problem-solving. You end up reacting to what went wrong rather than understanding what good work looks like.
Projects that teach useful habits
Key fobs and leather tags are a strong starting point. They are small, involve a simple cut, usually one stitch line, and a basic edge. You will get through several in a session and can compare results directly.
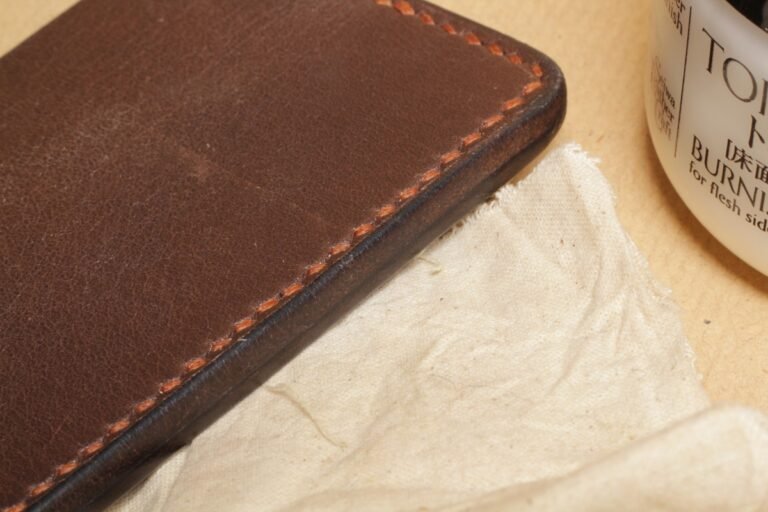
Card holders and flat wallets introduce the challenge of layering thin leather and stitching close to an edge. They also require the edges to look clean, which makes preparation discipline unavoidable.
Simple straps — belt straps, bag straps, luggage tags on loops — teach straight cutting over length, consistent marking, and even stitching along a longer run. The margin for error over 30 or 40 centimetres is more demanding than it looks.
Notebook covers introduce a fold, which means understanding how leather bends and how the grain surface behaves. They are forgiving on dimensions but unforgiving on edge finishing because the edges are visible all the way around.
Small pouches or tool rolls introduce the idea of construction — folding and stitching panels together — and typically include a few different stitch lengths and edge profiles. They are more involved than the items above, but still manageable early on.
What to focus on at each stage
In the first few projects, focus only on cut quality and stitch consistency. Nothing else. Is the cut straight and clean? Are the stitch holes evenly spaced and sitting in a straight line?
Once those feel controlled, add edge preparation. Is the edge bevelled cleanly? Is the sanding stage producing a smooth, even surface before burnishing? Is the burnishing compound being applied lightly enough?
Once those feel consistent, start thinking about construction — how the layers align, how glue is applied, how the piece sits together before stitching begins.
The stages build on each other. Rushing past any of them tends to mean working around problems rather than eliminating them.
Test on scrap before the final piece
Scrap leather is not a sign of failure. It is how you check that the glue is working, that the stitch spacing looks right, that the edge beveller is cutting cleanly on this specific leather, and that the burnishing product behaves as expected. Keep offcuts from every piece of leather you work with for exactly this purpose.
Progress is in the process, not the product
The goal of early projects is not a portfolio. It is building a repeatable process. When the cut is consistent, the stitch line is consistent, and the edges are consistently prepared, the finished items will look after themselves. Every experienced leatherworker reached that point by doing the same simple jobs over and over until they became reliable — not by attempting complex work before the fundamentals were solid.
Frequently asked questions
What is the easiest leather project for beginners?
A key fob or leather tag is the easiest starting point. It involves a single cut, minimal marking, usually one stitch line, and a basic edge. You can complete several in a session and compare results directly, which makes it easier to identify where the process needs improving.
What leather do I need for beginner projects?
Vegetable-tanned leather at around 1.5–2mm thickness works well for most beginner projects. It cuts cleanly, stitches well, and takes edge finishing properly. For card holders and slim wallets, thinner leather at 1–1.5mm is more suitable.
What are good leather projects for learning to stitch?
Simple straps, luggage tags, and card holders are the best stitching practice projects. They are long enough that the stitch line matters over a real run, but not so complex that other problems distract from the stitching itself. Running a stitch line on a scrap piece of leather before starting the actual project is always worth doing.
How long does it take to get good at leathercraft?
The core process — cutting, marking, stitching, finishing — becomes reliable within a few months of regular practice on simple projects. Most makers find that stitch consistency and edge finishing improve the fastest, while cutting accuracy takes slightly longer to develop confidently.